
Roof Numbers
Why I Have House Numbers On My Roof
As a new resident of Pittsburgh, I used Google Maps to learn about the city before I moved here. One of the difficulties I had when looking for homes was that the street numbers shown on Google Satellite View didn’t always line up with the buildings shown on Google Street View. Sometimes buildings had large enough house numbers that I could find the right place, other times it was more difficult. When I purchased a home, I wanted a way to differentiate my house when searched for using Satellite View from Google Maps. My solution was to put my house numbers on my roof, large enough that they could be seen from the air. As a website developer, I also chose to make my house number a URL, https://3219.US, the URL for this site. Here, I have also shared some about myself, my community, and my neighborhood. Establishing this URL for this home, will also be useful when I sell the house.
How I Created the House Numbers
The process for putting the numbers on the roof of my house involved several steps, many of which highlight the varied skills that I have developed over the years.
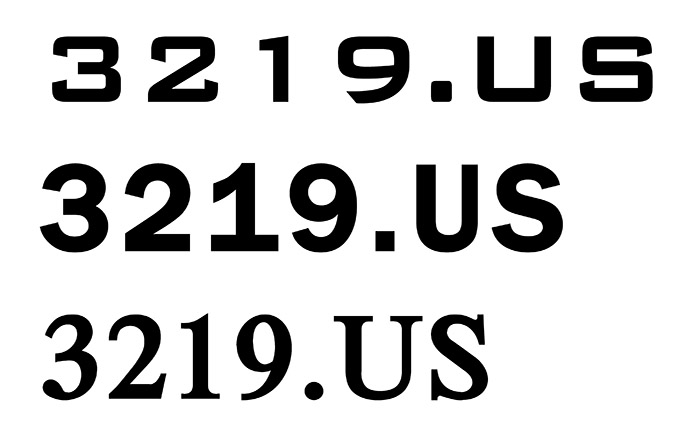
1) Researching Fonts and Colors
The first step was to research what type of lettering (fonts) have the greatest visibility from a distance. I learned that serif fonts (like Times New Roman) were not as visible from a distance as fonts without a serif (like Veranda). I also learned that bold lettering was easier to read from a distance. Based on this research, and some experimentation, the font I chose was Franklin Gothic Medium. Here is one of the tests I did comparing several recommended fonts for long distance visibility:
2) Making Digital Mock-ups, Blurred and Viewed at Various Scales
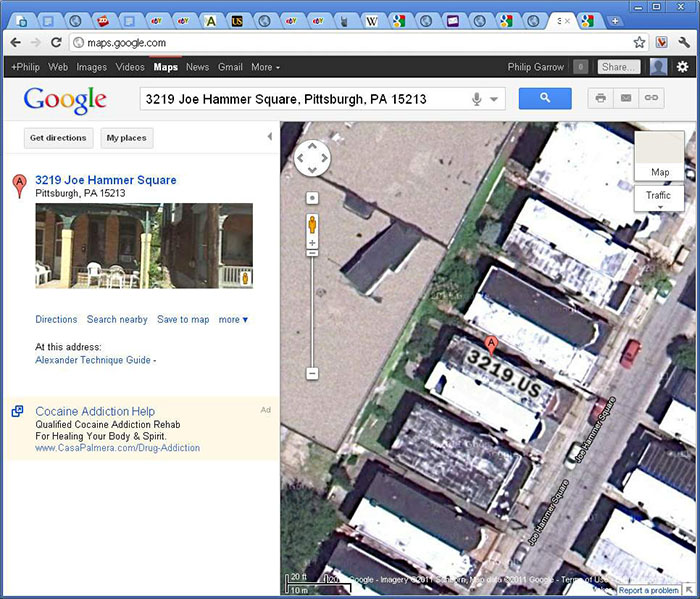
Once I selected the font, I then used Photoshop to lay out where the numbers would fit on the roof. I took a screen capture of the Google Satellite View of my home to use as the basis for my mock-up. I then created an image of the URL, assembled a text string in my chosen font, and scaled, rotated, and blurred, these numbers to approximate the resolution of the screen capture. Finally, I pasted my URL mock-up onto the screen capture of the Satellite View. This helped to approximate how the roof would look once the mural was complete. The result was the mock-up below, created before I painted the numbers on the roof. The Satellite View of the completed mural, shows numbers less blurry than the numbers in this mock-up.
3) Measuring the Roof for the Numbers
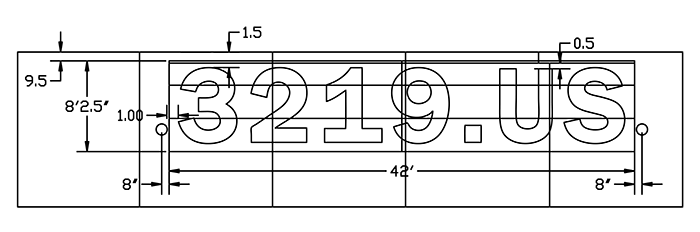
Based on my mock-up, I was satisfied that the string of numbers would be clearly visible from Google’s Satellite view. My next step was to measure the roof. A friend helped me get a discount on the thirty-two-foot extension ladder that I needed to climb from my backyard up onto the roof. It took me several hours to accurately measure the roof, and determine the location of each vent and chimney. These measurements allowed me to plan where the numbers would fit. Like every house in this row, this home is fifty-three feet long and sixteen feet wide. However, I couldn’t use all of this space, because the numbers needed to fit between the knee walls and the plumbing vents coming up through the roof. I input all of my measurements into a Computer Aided Drafting (CAD) drawing of my roof, with the following result.
4) Creating the Digital Stencils
The next step, was to refine the digital mock-up of the roof into data files that could be printed as full scale stencils to paint the numbers. I typeset the short string of numbers in a vector editing program, and used a feature called Trace Outlines to create the line drawing of this string of text. I saved these outlines in a Drawing Exchange Format (DXF) file which I then imported into CAD. In CAD, I scaled and positioned the letters to fit within the obstructions I had surveyed on my roof. I knew that the standard width of a roll architectural printer paper is three feet wide, so I separated the letter outlines into strips that could be plotted as separate pieces. During this conversion, I added bridge strips to hold the edges of the stencils and loose pieces.

5) Creating the Paper Stencils
The stencil output needed to be converted into separate files that could be individually printed at full scale. I tried to output these thirteen strips as PDFs, planning to have them plotted at a local print shop. The print shop had already told me they could not print CAD files directly. One problem is, the maximum size of a PDF image is only six feet long. I needed strips printed nine feet long. Another problem is, their cost for printing these stencils was a dollar per square foot. The cost for printing my stencils would have been about $387.00.
I could have partitioned my stencil into smaller strips, but what I really wanted was to output directly from CAD to a plotter. By luck, I read that someone was giving away an old architectural sized plotter on FreeCycle. I picked up the plotter for free, but then had to have it repaired, purchase paper, ink, and download the print drivers needed to make the fifteen-year-old plotter work with my computer. It took about a month to track down a replacement clutch assembly to get the plotter working again.
Once the thirteen nine-foot-long paper strips had been plotted full size, I cut them out with scissors, following the plotted outline of the numbers. Predictably, it was challenging to handle the many large pieces of paper stencil.
6) Selecting the Materials
I researched online to learn what materials I could use on my roof to have the highest visibility, while being durable enough to withstand years of Pittsburgh weather. My first idea was to paint red numbers on a white background. Reading further, I learned that the high contrast of black on white provided greater visibility from a distance than red or blue on white. I also learned that paint would be a bad choice to letter with, because it wouldn’t expand and contract with the roofing material.
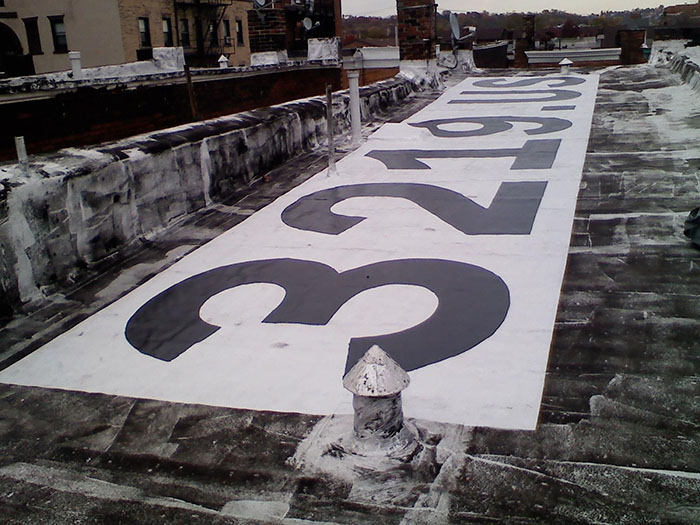
The solution for both visibility and durability was to use standard roofing materials for both the background and the numbers. For the background, I used roofing silver, an aluminum based coating, commonly used to reflect the summer heat off of roofs. For the lettering, I used roofing tar, a material commonly used to seal seams in the roof. In an aerial photograph, the silver background reads as white. The black roofing tar has a high contrast against this silver background.
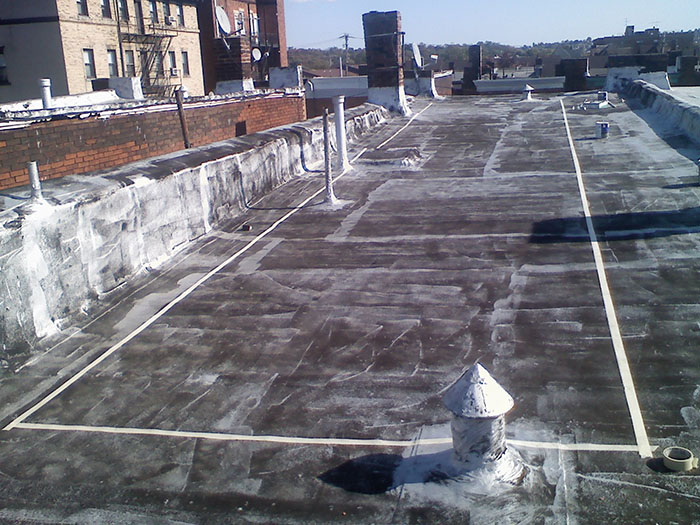
7) Preparing the Roof
The roof is a black membrane, that had been silvered over many years before. Much of this silver had been washed away over the years, leaving the roof with a mottled appearance. To prepare my canvas, I carefully measured and taped off the area where I would paint my numbers. From when I measured the roof, I knew that no edge was straight or even, and I would need to establish my own baseline to work from. After establishing this baseline, I taped off the nine-foot by forty-three foot rectangle where the letters would be painted. Inside this rectangle, I brushed on a fresh coat of roofing silver. I purchased the roofing silver in one gallon containers, making them easier to carry up the thirty-two-foot ladder one at a time in my backpack.
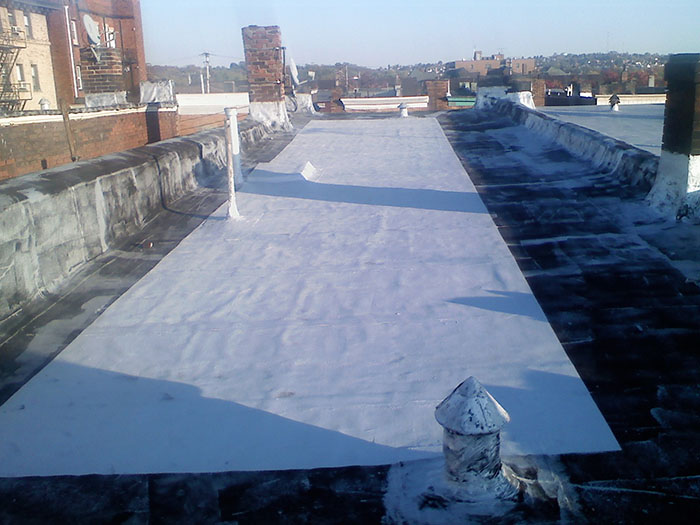
8) Laying out the Stencils
Once the roofing silver was dry, I laid out the paper stencils in the positions I had planned in CAD. Positioning these light pieces of paper was challenging, as they blew around with even a light breeze. I measured where each stencil went, and taped it down each outside edge. I then carefully curved narrow masking tape around the inside edge of each large letter. I knew the tape would be needed to prevent the roofing tar from seeping under the inside edges of the stencils.
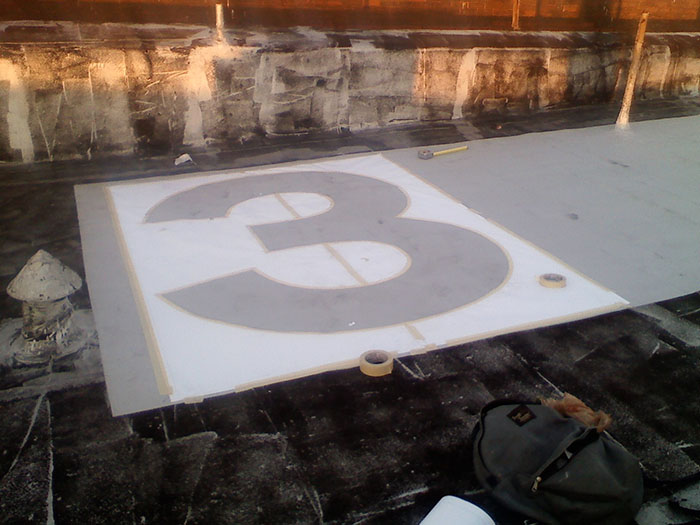
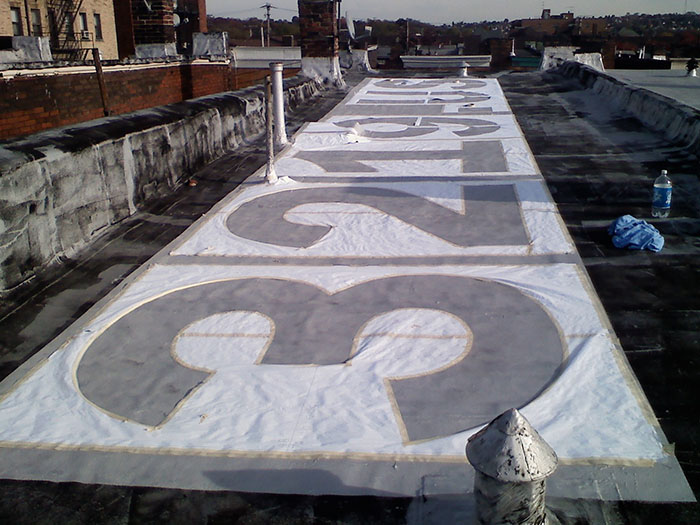
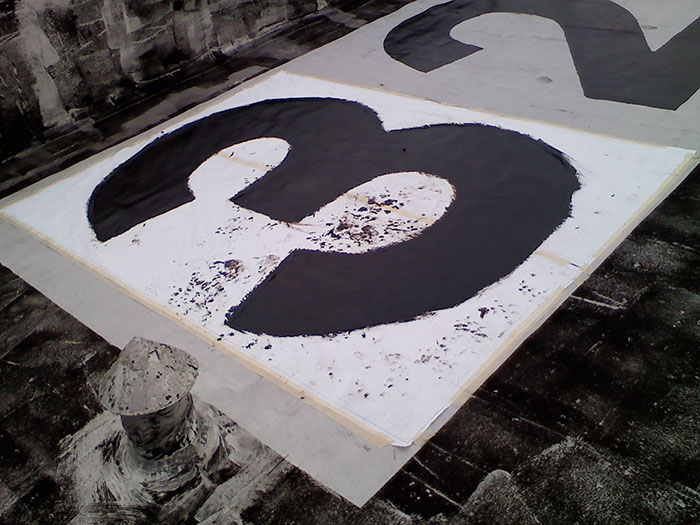
9) Painting the Roof
With the stencils taped in place, I applied black roofing tar inside the shapes of the letters. Roofing tar is not intended as a painting media. The black tar was hard to paint onto the roof using a four-inch brush. It took me one long day to paint all the letters onto the roof. I waited until the next day to climb back onto the roof and peel up the stencils. Even with careful taping, in places the roofing tar seeped slightly under the stencils, although this is not visible in the aerial photograph.
10) Waiting for Google Maps to Re-photograph the Roof
Before I started this roof numbering project, I learned that Google updates their satellite images every three years. Looking at the previous satellite images of my block, I estimated that the last images had been taken in the summer of 2009. In the spring of that year, a large tree had been cut down on my neighbor’s property, and that tree was missing from the 2009 image. To avoid waiting another three years, I knew I needed to have my roof painted before June 2012. I completed this project in the fall of 2011.
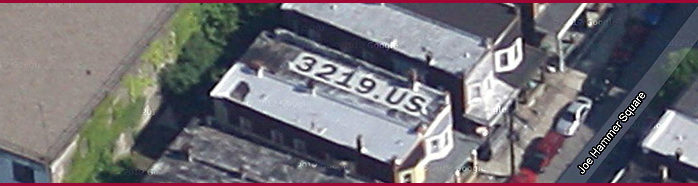
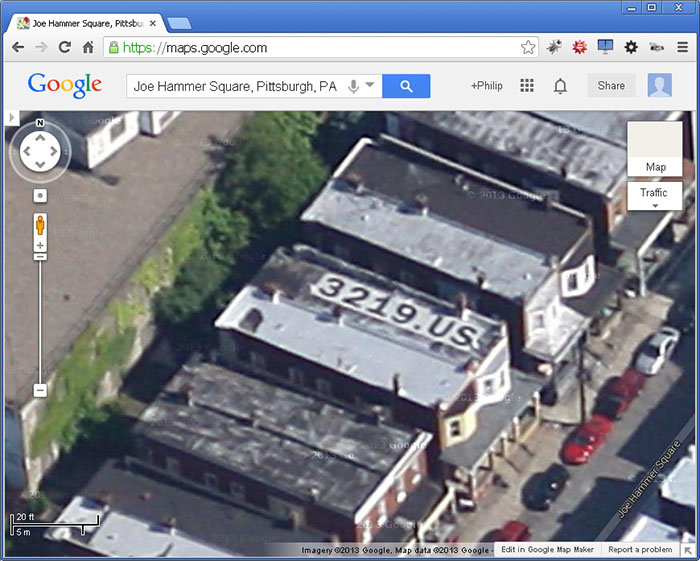 Project Complete. My roof as seen from Google’s Satellite view!